
Here is a high intensity session that focuses on different ways of eliminating the opponent as efficiently as possible. Plenty of 1V1, 2V1, 3V3 and 4V3 scenarios. This is great for attacking in small spaces as well as learning how to defend in an overload situation. Enjoy!
Download Color PDF | Download B&W PDF | Session Planner Permalink
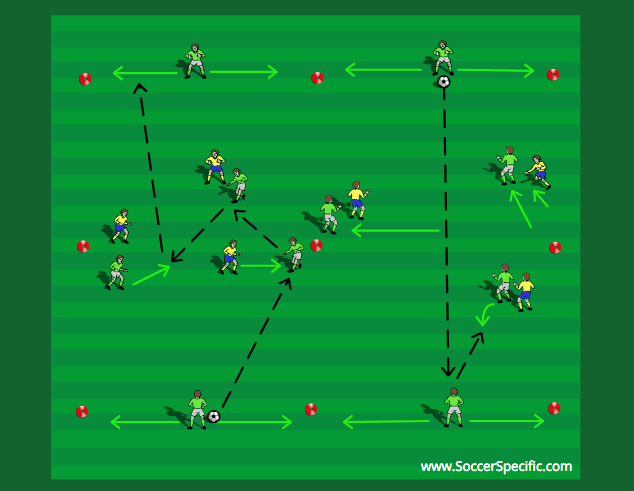
1.
Setup:
16 players working in 5X20 channels, work up and down the ladder as shown.
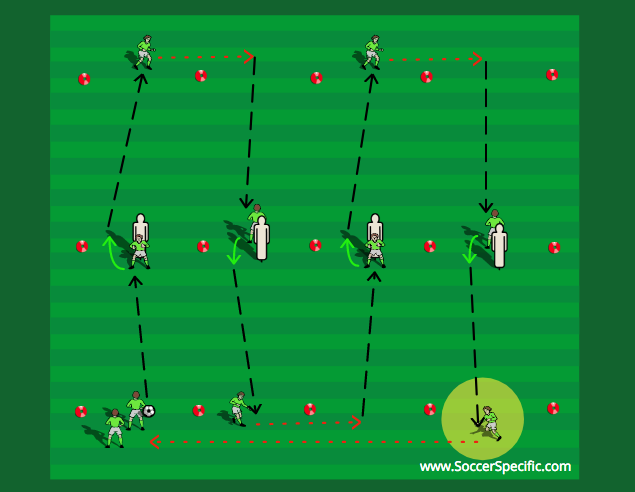
Instructions:
Ball is played in with pace to the player in the middle of the channel. The player receiving the ball must feel the pressure of the mannequin and make a tight turn, sealing off the defender and connect the pass with the target at the other end. The target takes his first touch in to space over to the next channel and the sequence is repeated. Work the ball to end of the ladder and the player highlighted in yellow dribbles at pace to the beginning. Players advance one for rotation.
Coaching Points:
The focus is sealing off the defender and eliminating the mannequin on the first touch. Low center of gravity, strong body posture, turning left and right.
2.
Setup:
16 players working in 5X20 channels, work up and down the ladder as shown.
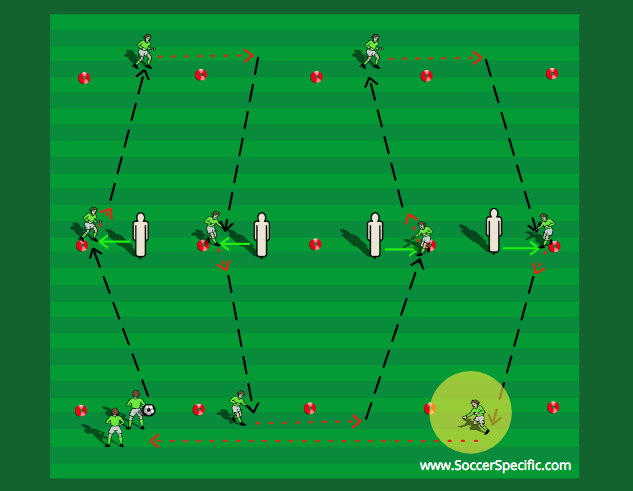
Instructions:
Ball is played in with pace to the player in the middle that has cleared the space and moved away from the mannequin. First touch is taken towards the target on the other side who penetrates on the dribble to the next channel where the sequence is repeated. The player highlighted in yellow dribbles at pace to the beginning. Players advance one for rotation.
Coaching Points:
Explosive movement away from the mannequin creating space for himself to receive the ball on a half turn under less pressure. Make sure the player opens his body to the playing field so they can recognize the pressure.
3.
Setup:
16 players working in 5X20 channels, work up and down the ladder as shown.
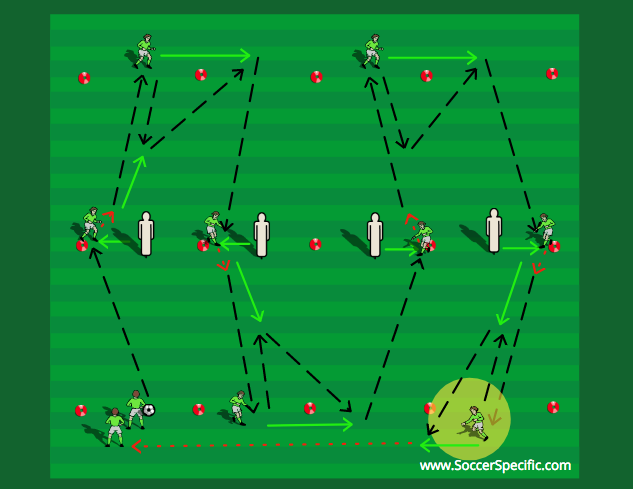
Instructions:
Same as before, the ball is played in with pace to the player in the middle who has opened up to receive the ball on a half turn. This time they combine with the target who penetrates to the next channel. Player in yellow dribbles at pace back to the beginning. Players advance one for rotation.
Coaching Points:
Explosive movement away from the mannequin, receiving the ball on a half turn, properly weighted passes to the target, accurate passing, communication “man on”.
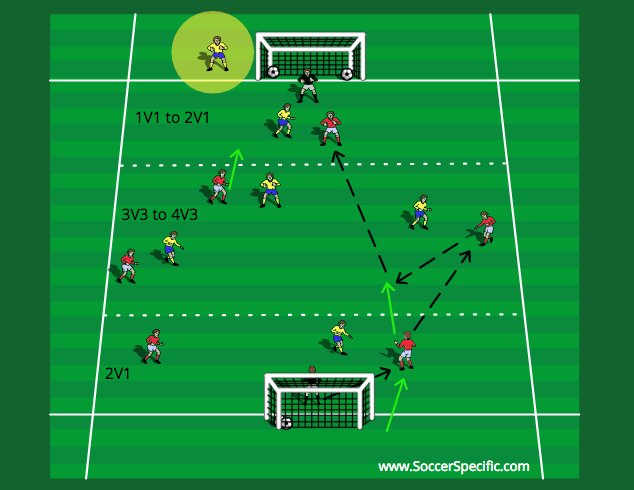
4.
Setup:
2V1 to targets. Take away the mannequins and use live defenders. Four players working independently in four different channels. Both directions.
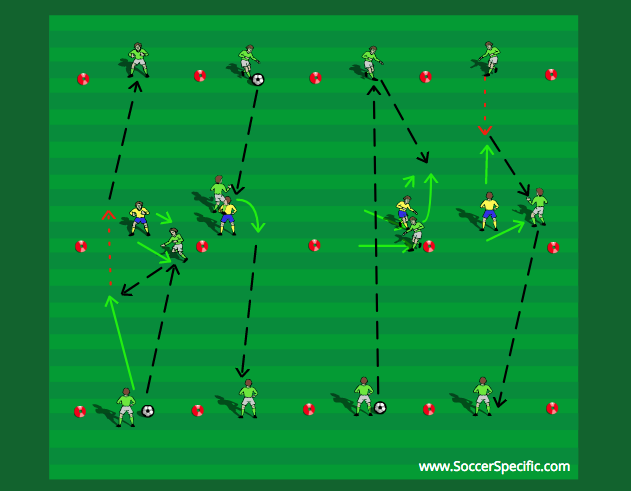
Instructions:
The target with the ball on the outside looks to combine to get the ball to the other target. Once the ball has arrived, they work back the other direction.
Coaching Points:
Movement off the ball, create separation from the live defender. Look to penetrate on the dribble, with a pass, combo in behind, or a tight turn sealing off the defender.
5.
Setup:
3V3 to targets, take out the middle cones creating two separate 10X20 areas. Work both directions as shown.
Instructions:
Target players work with both teams trying to advance the ball from one side to the other by using the three players in the middle.
Coaching Points:
Spacial awareness of the three players, dragging the defenders out of positions, look to eliminate as many defenders with one action.
6.
Setup:
7V7-1 to goals. The red team is in possession of the ball so one of the yellow defenders has stepped off the field of play. When the yellow team wins possession and attacks, one of the red defenders must do the same. The yellow defender can now join the build up out of the back.
Instructions:
One player can advance one zone creating a numerical advantage.
Coaching Points:
All previous coaching points to beat the defenders as quickly as possible and create chances on goal.